Whole-Wheat Croissants
In the months since my last post, I have graduated culinary school, moved three times, and started not one, but TWO new jobs here in Boston. If that isn’t enough, let me elaborate: my kitchen during the summer months had no windows. The kitchen at my restaurant has no windows. My current kitchen delivers a real one-two punch: indirect sunlight paired with just one flimsy light fixture attached to the 9-foot ceiling. Oh, the struggle to take good pictures of food! Do you forgive me, just a little bit, for waiting this long to share another recipe with you?
If anything could turn you back into a follower, this recipe would be it.

Imagine the flakiness of a traditional croissant with an elusive nuttiness that you can’t quite seem to resist. Typically, I find that many people find the flavor of whole-wheat flour off-putting, but the combination of whole-wheat flour with the butter and salt in this recipe seems to have a magical quality.

Because I was trying to please a crowd this Christmas, I filled my croissant dough with various savory fillings, including ham & cheese and spinach & feta (pictured above.) Anything that does not contain too much excess moisture should make a fine filling; to use the spinach, for example, I cooked one small package of frozen spinach and pressed it into a fine-mesh sieve to remove excess water before filling my croissants.
Once you master the laminating part, you should feel free to fill and shape the dough as you like; I hope that this quick tutorial brings you back into my good graces and fills some of your tables during this New Year celebration. Enjoy!
———————————————————————–
Whole-Wheat Croissants
Lightly adapted from David Lebovitz’s version
Yield: 6 pastries
3/4 c. whole or reduced fat milk
2 tsp active dry yeast
175 g all-purpose flour
105 g whole-wheat flour (I used Bob’s Red Mill)
2 Tbsp sugar
1 1/4 tsp kosher salt
5 1/2 oz cold butter
–
1. Make the dough: Heat the milk to approximately 95-100º F, or the temperature of a warm bath. Whisk in the active dry yeast and allow to sit for 10 minutes before adding the flour, whole-wheat flour, sugar, and salt. Knead the dough only until all of the ingredients are fully combined; the dough will finish developing during the laminating process. Wrap the dough loosely in plastic wrap, as it will expand a bit in the fridge, and refrigerate overnight.
2. Make the butter block and laminate the dough: I like these instructions from America’s Test Kitchen, or you can follow the instructions that David posted along with the recipe. They offer two different methods, so you can choose which is more understandable for you.
3. Shape your croissants: Make sure to use a sharp knife or pastry wheel to trim the edges and expose those beautiful layers you just worked so hard to create! You can shape the dough into the traditional crescent shape; for filled croissants, I cut mine into 3 x 5″ rectangles and filled them like this:

4. Proof and bake: Once your croissants are shaped, cover them loosely with plastic and allow them to proof until they are soft to the touch and hold an indentation. Lightly brush them with egg wash and bake at 375º F for 25-35 minutes, or until pastry is dark golden brown and feels light when lifted. One note: If you are proofing them in a warm spot, be sure it is no warmer than 80º F. An environment that is too warm will melt the butter, and you’ll watch your hard work ooze all over your clean baking sheet.
5. Allow the croissants to cool slightly before devouring. If you don’t finish all six in one sitting, you can keep the croissants in an airtight container for up to four days; however, I would recommend warming it slightly in a toaster oven or in a 350º F oven to get those flaky layers crisp again!
Mini Lemon Tarts
If you haven’t visited King Arthur Flour’s recipe collection, you’ve really been missing out. First of all, I usually have luck with the flavor and quality of their recipes. Second of all–and this is a godsend for those of us who can no longer bake with volumetric measurements, which I lovingly refer to as “cups & stuff”–every recipe appears (1) volumetrically, (2) in pounds and ounces, and (3) in grams. Woah, baby.
This particular recipe was requested by some family members who love lemon, and it turned out really nicely. As someone who grew up on bottled lemon juice, I’m here to tell you: freshly-squeezed lemon juice and zest make all the difference, especially in a recipe with as few ingredients as this one.

If your mini muffin pan is nonstick, you don’t even have to spray it; as long as you’re careful not to over-fill the tart shells, these little guys pop right out.
The dough puffs quite a bit, so you should roll the dough pretty thinly. I used this cutter because it was the one I had on hand, but a slightly larger one–2 3/4″, as the recipe specifies–would have worked better.

See how my dough comes up a little short in the tin? If your dough comes all the way to the top of the muffin tin, you’ll have a better ratio of crust to filling. I also had some filling left at the end, which probably wouldn’t have happened if I had cut the circles slightly larger.
In short: do as I say, not as I do. Follow the instructions in the recipe, and you’ll be fine.


Even though citrus fruits are typically associated with winter, lemon seems to hold a special place in springtime recipes, when cherries, apricots, and peaches are right around the corner. Cheers to a lovely Memorial Day and an even lovelier summer. Enjoy!
—————————————-
Mini Lemon Tarts
From King Arthur’s recipe. I made it in grams, but you can refer to their recipes for pounds/ounces or volume measurements
Crust:
85 g cream cheese, softened
85 g unsalted butter, softened
1 tsp granulated sugar
1/4 tsp salt
92 g all-purpose flour
Filling:
113 g fresh lemon juice, about 2 ea
1 Tbsp fresh lemon zest
206 g granulated sugar
3 large eggs
76 g sour cream (I used fat-free, and it worked fine)
–
1. Make the crust: Mix together the cream cheese, butter, sugar, and salt until smooth. Add the flour and mix gently until the dough is cohesive. Shape the dough into a disk, wrap it in plastic, and refrigerate for at least 1 hour, or until it is stiff enough to roll out.
2. Make the filling: Whisk together the lemon juice, zest, and sugar. Whisk in the eggs, then the sour cream. To make it easier to fill the tarts, I would suggest transferring the filling to a pitcher.
3. Assemble your mini tarts: On a floured surface, roll the dough to a thickness of 1/8″.
4. Using a 2 3/4″ round cutter, cut out 24 circles. You can press the dough back together and re-roll it as necessary, but you should re-roll as little as possible.
5. Preheat the oven to 375º.
6. Transfer the dough circles to the mini muffin cups, pressing into the corners and up the sides of each cup.
7. Pour the filling into each of the tart shells until it nearly reaches the rim of the cup. If you overfill the tarts, the filling will bake onto the pan and become very difficult to remove, so be careful!
8. Bake the tarts for 28-30 minutes, or until the crust is golden brown and the filling has set.
9. Remove the pan from the oven and allow the tarts to cool for 10 minutes in the pan before removing to a rack to cool completely. If desired, you can dust them with confectioner’s sugar just before serving.
Cardamom Buttermilk Coffee Cake
I am so very glad not to be a picky eater. There are foods I dislike, of course, but I’ll try pretty much anything once, and I often like it. In several cases, I have discovered a new flavor that has become an obsession. Brown butter was the first. Then came cardamom. I hadn’t heard of it until about three years ago, but now I’m kind of a sucker for it. I go out of my way to find it. I mix it into my coffee grounds to make cardamom coffee. If it’s on the dessert menu, I’m sold.
And if it’s in a recipe for a delicious-sounding quickbread, I’ll make that recipe three. times. before I even tell you about it. Shame on me.

Now, it must be said: cardamom is one of those spices that can very easily become overwhelming. Thankfully, this cake includes what I consider to be the perfect amount. It also contains one of my favorite baking ingredients: buttermilk. And, unlike many recipes that leave me with a partial container of buttermilk, which inevitably sits in the fridge until it spoils, this recipe uses exactly one pint. Beauteous.
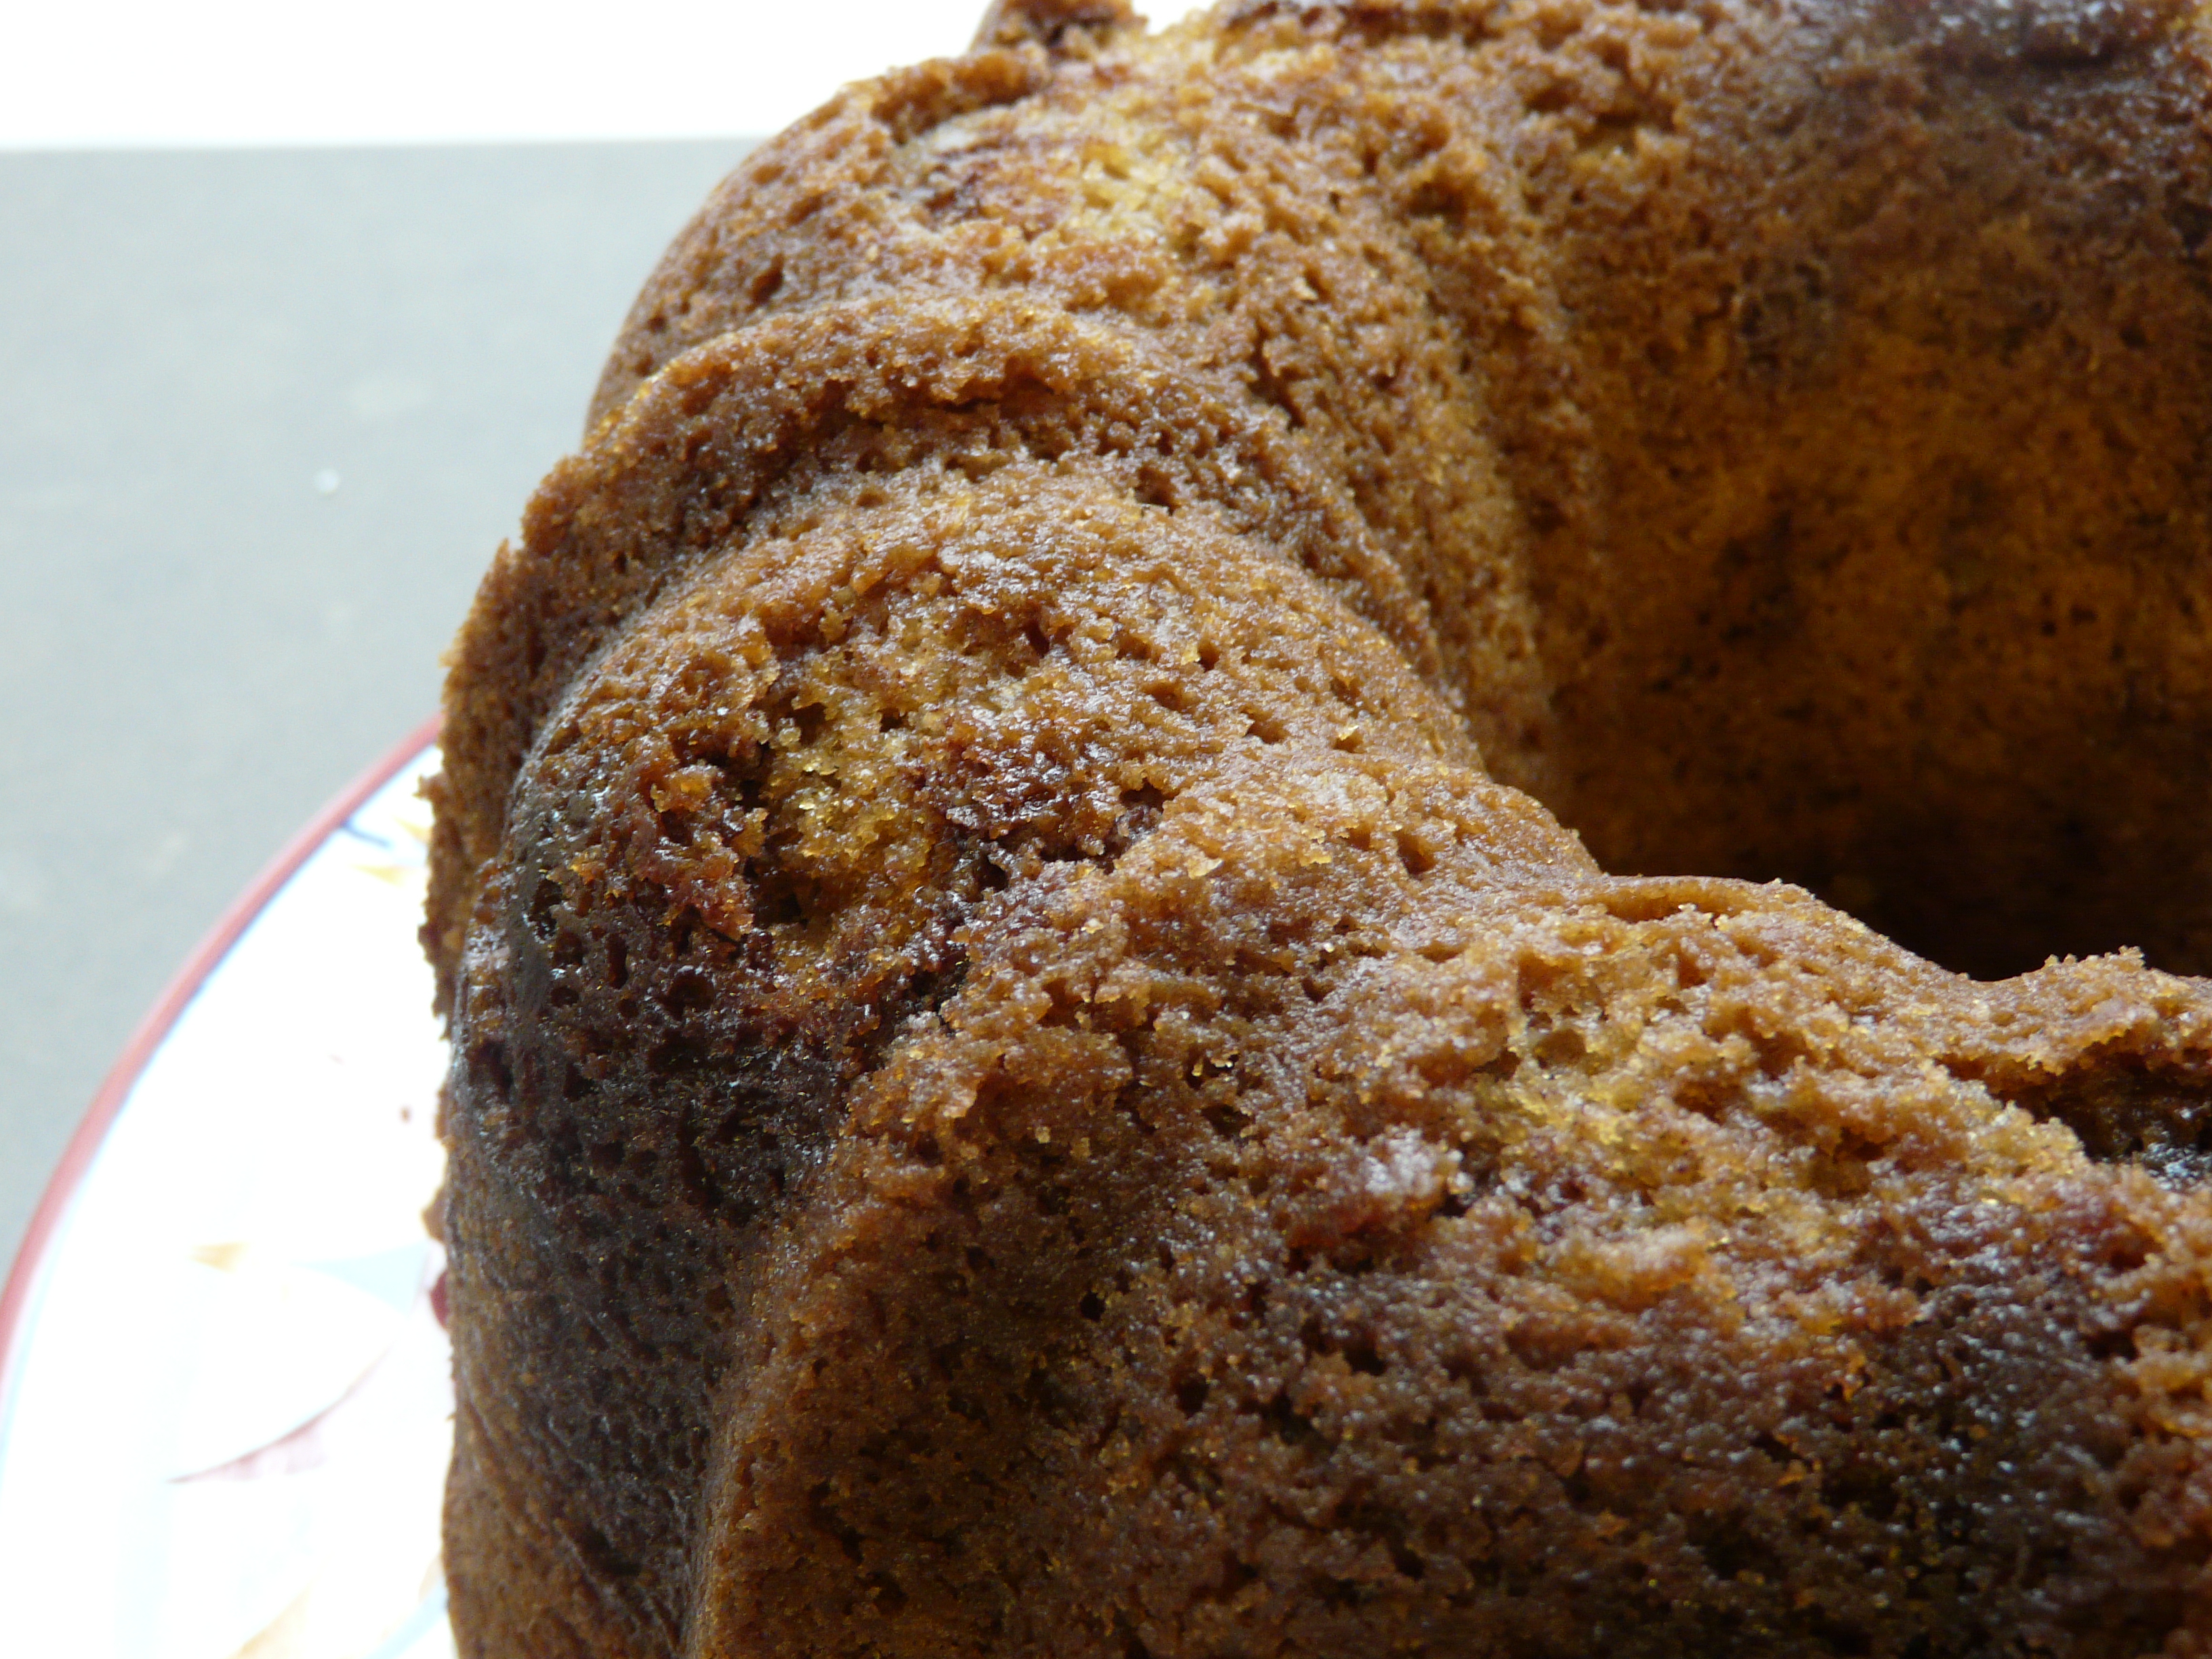

Perhaps the best part about this cake is the two secret layers of cinnamon-brown sugar nestled inside.

Look at that cheeky cake. You could probably go your whole life thinking it was a regular ol’ Bundt cake, just like any other, until you cut out a slice and then… bam! Brown sugary goodness, all swirled up in every bite.
Talk about a pleasant surprise.


Now, I did make a few changes, mostly to adapt to the ingredients I had: I subbed half of the brown sugar for dark brown sugar, removed the walnuts from the filling, increased the amount of sugar swirl, and weighed all of the ingredients in grams. I would definitely recommend including some toasted walnuts in the sugar swirl, if you have them on hand!
With or without walnuts, this cake is good warm, cold, or toasted in the oven with a pat of butter on top. And it stays moist for at least three days, assuming you’re able to keep it around that long. Any way you slice it, it’s a keeper. Enjoy!
—————————————-
Cardamom Buttermilk Coffee Cake
adapted from Mollie Katzen’s recipe in this lovely cookbook, where she writes: “Very Rich ~ Very Delicious”
Yield: two 9×5 loaf pans or one 10-inch Bundt pan. 24 slices, by my knife
–
Cake Batter:
1 lb (454 g) butter, softened
1 c. (170 g) light brown sugar
1 c. (170 g) dark brown sugar
4 eggs
2 tsp (10 g) vanilla extract
4 c (484 g) all-purpose flour
2 tsp (7 g) baking powder
2 1/2 tsp (14 g) baking soda
1/2 tsp (2 g) salt
1 Tbsp (5 g) powdered cardamom
2 c (467 g) buttermilk
–
Sugar Swirl:
1/2 c (90 g) brown sugar
1 Tbsp (5 g) cinnamon
1/c c walnuts, toasted and roughly chopped (optional)
–
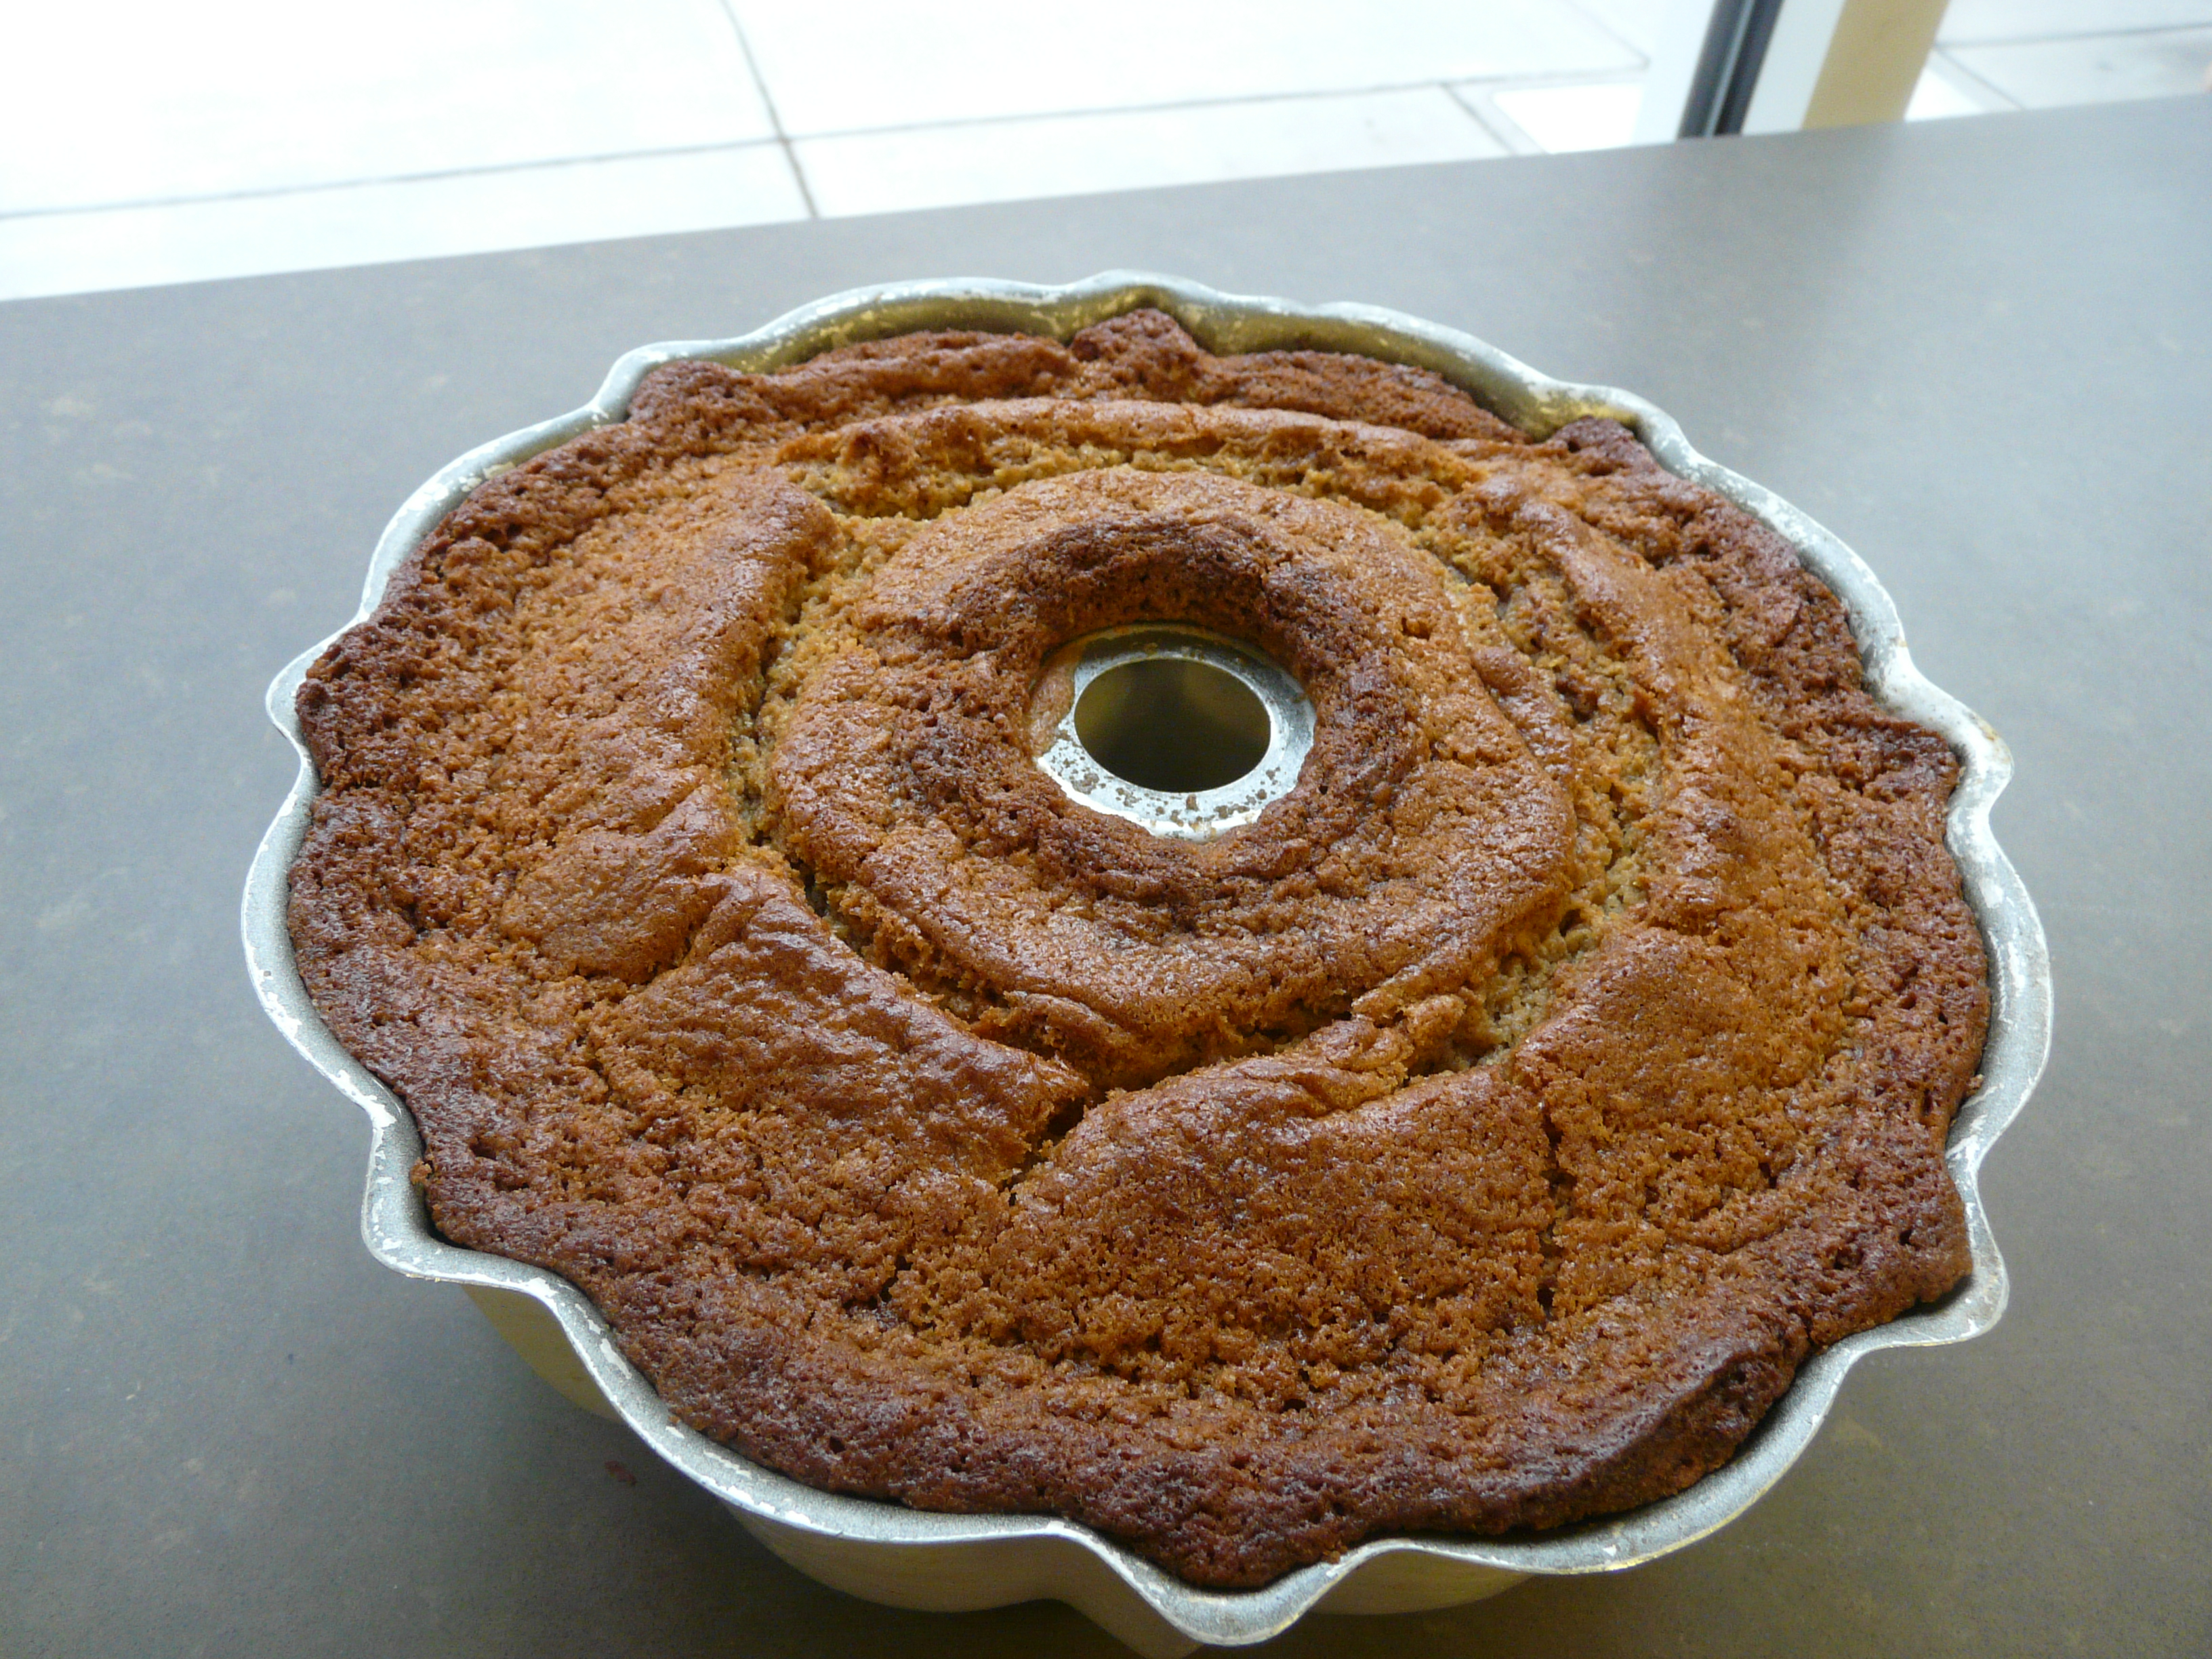
1. Preheat oven to 350º. Butter a 10-inch Bundt pan and set aside.
2. In a large mixing bowl, beat the butter and sugars until light and fluffy. Add the eggs one at a time, beating well after each addition. Stir in the vanilla.
3. Sift together the flour, baking powder, baking soda, salt, and cardamom in a separate bowl. Add the flour mixture, 1/3 of it at a time, to the butter mixture, alternating with the buttermilk. Stir just enough to blend after each addition.
4. Combine the sugar swirl ingredients in a separate bowl.
5. Spoon approximately 1/3 of the batter into the prepared pan. Sprinkle with half of the swirl mixture, then add another 1/3 of the batter. Cover with remaining swirl, then top with remaining batter. Lightly spread into place.
6. Bake approximately 1 1/4 hours, or until the cake springs back lightly when touched and a skewer inserted into the center of the cake comes out clean. Allow to cool in the pan for 20 minutes, then invert onto a cooling rack. “Cool at least 30 minutes more before wildly devouring.”
Mexican Chocolate Cupcakes with Dulce de Leche Filling and Cinnamon-Cream Cheese Frosting
I’ve never been a big fan of cupcakes, and I’ve been especially annoyed by their lingering ubiquity these past few years. Let me tell you, friends, cupcakes have been on their way out for a long time now, and I wish they’d hurry up already. I just don’t think they’re very interesting.
But this particular cupcake recipe had such a tempting flavor combination that I was intrigued enough to give it a shot. I had also never made my own dulce de leche at home, so I couldn’t help myself. I’m just too curious.

The first time I made the cupcakes, I was content with the actual cupcake and very unhappy with the sticky frosting. Perhaps my homemade dulce was the culprit, but–despite its great flavor–the frosting was hard to work with and even harder to eat.

So the second time I made them, I moved the sticky frosting into the center of the cupcake and created a new cream cheese frosting to put on top. And voilà, just like that, a new cupcake was born.


As I note in the recipe below, you should be sure to fill your cupcakes slightly less than the unfrosted one you see above. I filled mine up to the top, and the weight of the cream cheese frosting was enough to induce an oozy dulce de leche hemorrhage, just in time for the photo shoot. Unsightly? Most definitely. Delicious? You bet.

The final result was a multi-flavor, multi-texture cupcake that was even better than I expected.

Enjoy!

——————————
Homemade Dulce de Leche
1 can sweetened condensed milk
–
1. Place can in a large pot and cover completely with water. I covered mine with 3-4 inches of water to be sure it wouldn’t evaporate while I was gone, and it worked just fine.
2. Bring the water to a soft boil and boil the can for four hours, refilling the water as necessary.
3. Remove the can–which will be quite hot for a while–from the water. If you don’t use the dulce immediately, keep the can in the refrigerator, unopened, until you use it.
——————————-
Mexican Chocolate Cupcakes with Dulce de Leche Filling and Cinnamon-Cream Cheese Frosting
Adapted from Bake or Break; yields 20 cupcakes
For the cupcake:
2 c. all-purpose flour
2 tsp. baking powder
1/2 tsp. salt
2 1/4 tsp. cinnamon
1/2 c. unsweetened cocoa powder
1 c. unsalted butter, softened
1 1/2 c. granulated sugar
1/2 c. light brown sugar
3 large eggs
1 Tbsp. vanilla extract
1 c. milk
For the filling:
3 oz. cream cheese, softened
4.5 oz. dulce de leche
1 tsp. vanilla extract
pinch of salt
For the frosting:
8 oz cream cheese, softened
4 oz butter, softened
1 1/2 tsp. vanilla
1 1/2 c. confectioner’s sugar
1 tsp. cinnamon
–
1. Preheat the oven to 350°.
2. Whisk together the flour, baking powder, salt, cinnamon, and cocoa powder. Set aside.
3. With an electric mixer, cream the butter with the sugars until light and fluffy. Add the eggs and vanilla; mix until combined, being sure to scrape the bowl well. Alternately add the combined dries and the milk in three batches, beginning and ending with the dries. Mix just until combined each time.
4. Spoon the batter into paper-lined cupcake pans (I tried to bake a few without the papers, and the end result was not pretty.) Each one should be 2/3 full.
5. Bake at 350° for 15-20 minutes or until the cake springs back to the touch.
6. Meanwhile, combine the filling ingredients in a medium bowl.
7. With an electric mixer, cream the butter and cream cheese until there are no lumps. Then add the remaining frosting ingredients and beat until light and fluffy.
8. When the cupcakes are completely cool, use a paring knife to cut out a small cone in the center of each cupcake and spoon just a bit of filling into each cupcake. It should be slightly underfilled to avoid oozing. Then pipe the cream cheese frosting on top of the finished cupcake. I had just enough to frost them “Dairy Queen” style (see pictures for reference.) If you prefer a higher frosting-to-cupcake ratio, you may want to make more frosting.
9. Enjoy with reckless abandon!
A note: I used the cream cheese/dulce mix for the cupcake’s center simply because I was trying to use it up; if you want something a little firmer, you could mix the dulce de leche with just a pinch of salt and pipe it into the center as-is. The cupcake would probably be easier to eat. Let me know if you try it!
Salted Cashew Crunch Cookies
If I thought testing three scone recipes was hard, nothing could have prepared me for the class I just finished. In Advanced Baking Principles, we were required to take a control recipe (I chose scones, of course) and modify it to cater to different dietary needs. I made gluten-free, vegan, and reduced-calorie scones. Arriving at those final recipes required 17 different trial batches.


Honestly, I really enjoyed testing recipes and learning more about ingredients like sugar replacers, egg replacers, and non-wheat flour blends. There’s something to be said for perfecting a recipe before you share it with others, and making positive changes to any recipe requires an impressive control over the scientific basics of baking. If I’d had more time, I definitely would have done more trials of all of my scones; I could have been happier with the final results, even after the better part of 20 test batches.
But man, when I finally pulled my last batch of scones out of the oven, I was determined to make something else. Anything else. Something chock full of fat, gluten, and animal products. The more calories the better! ANYTHING.
The first recipe I decided to try was these salted cashew crunch cookies. Just after I put them in the oven, I realized that, in the Universe’s penchant for irony, these cookies were gluten-free. And, of course, they were absolutely delicious.

A quick note regarding the salt level of these cookies: in order to maintain their status as “salted” rather than “salty,” be conscious of the products you add. If you use cashews that are pre-salted, reduce the amount of salt in the dough. If you only have iodized salt in your kitchen, don’t sprinkle it on top of these cookies, as it doesn’t act the same way as sea salt does. Instead, use it to lightly salt the nuts when you toast them.

Whether you need to eat gluten-free or just enjoy oat-filled cookies as much as I do, these are a fantastic addition to any recipe collection. Enjoy!
————————-
Salted Cashew Crunch Cookies
Adapted from Bake or Break
2 c (200 g) rolled oats *use certified gluten-free oats for a truly gluten-free product
1/2 tsp salt
1/4 tsp baking powder
1/2 c (4 oz) butter
3/4 c (158 g) sugar
1 egg
1 tsp vanilla extract
2 c (288 g) cashews, lightly toasted and roughly chopped
Maldon sea salt, as needed
1. In the bowl of a food processor, blend the rolled oats for 30 seconds, or until a coarse oat flour forms. In a small bowl, combine the blended oats with the salt and baking powder. Set aside.
2. Cream the butter and the sugar until light and fluffy. Add the egg and vanilla and mix just until combined, scraping down the bowl well.
3. Add the combined dry ingredients and mix just until combined. Fold in the chopped cashews.
4. Scoop the cookies by the rounded tablespoon onto a parchment-lined sheet pan. These cookies will not spread, so use the bottom of a glass or a greased palm to flatten the cookies slightly.
5. Sprinkle very lightly with Maldon sea salt and bake at 350° for 12-14 minutes, or until lightly golden-brown. Allow to cool completely before devouring.
